Hey yall, so I had the chance to try the RevAir Reverse-Air Dryer that everyone has been raving about and I have to say I am slightly obsessed for a few reasons, which I plan to share here!
I received my RevAir Reverse-Air Dryer last month and I have used it 3 times! YES, 3 times! In this post, I wanted to share some best practices as well as describe what I think was the best way to use it for me and possibly for you if you have a similar texture to mine.
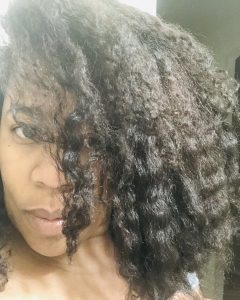
I am not a hair type-ing professional but from my experience over the years, I would say that my hair falls around the 4A category. The most important thing to know is that my strands are super fine and I have a lot of them!
Added to that my hair is prone to tangles, I love wash and goes but for me braid-outs are better! (I always keep my hair stretched for fewer tangles and a peaceful life.)
Now that you know all of that the biggest disclaimer I have is that everybody’s blow dry experience regardless of the tool used will be different, this is mine for my specific hair type.
First things first – Best practices
I was really grateful that the brand sent over specific instructions on how to use the blowdryer with some of their main points being based on some of the reviews that many of you have already done. The truth is, they are learning from us as much as they are teaching the community about how to use this device and following their instructions is important.
Here are the top 4 tips you need to know:
Determine the best tension for you
This is the dial on the Base Unit. Tension replaces the need for a brush or hot flat irons. I started with heat setting 3 as instructed but figured out that a higher setting 6/7 worked best. Coily, type 4 hair according to the brand usually works best around Level 5-7.
No pumping, twisting or bouncing
Probably the best piece of advice I received was that there is no need to pump, move around or bounce the wand.
In fact, when you do that, you are not allowing the roots to get dry. The reverse-air move constantly and consistently down the entire length of your hair, drying from root to end at once. Bouncing the want disrupts airflow and can cause massive tangles.
Give it time to dry
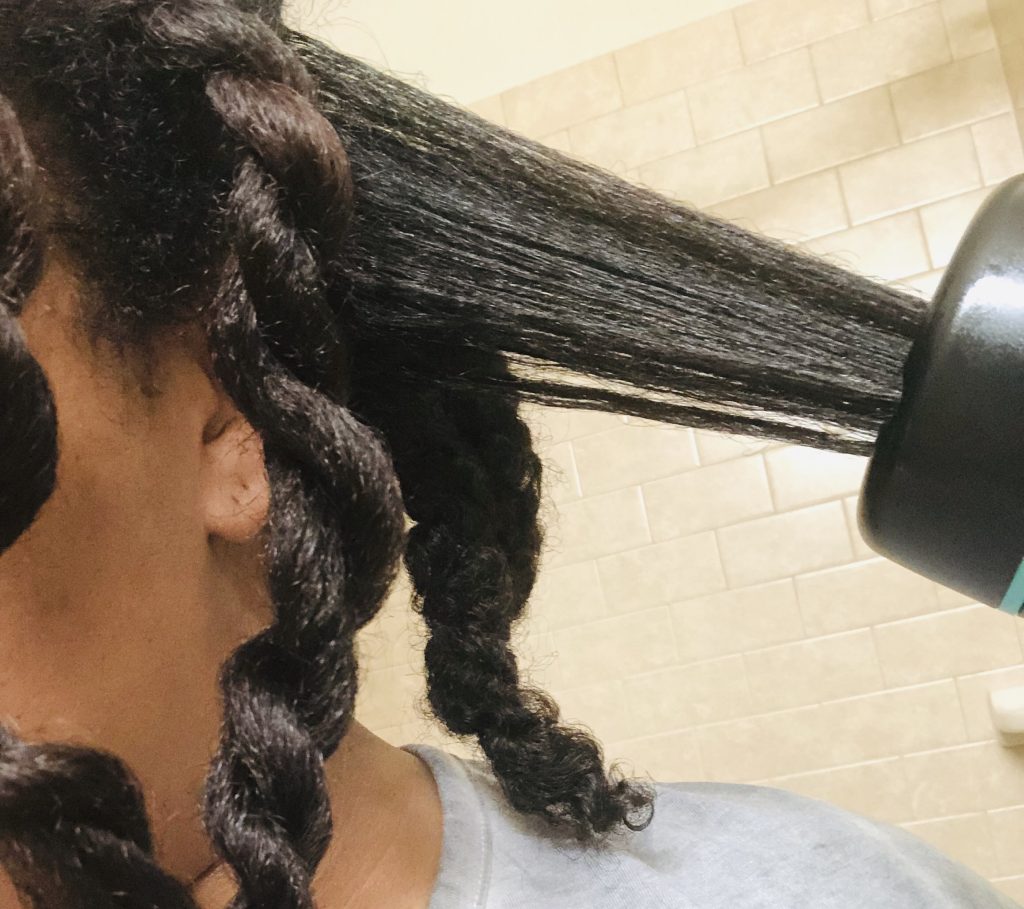
Each section will dry in 30-90 SECONDS, so long as wand is kept to the scalp. Thickness, texture and section size mean your time may vary. Personally, I have found that small to medium sections work best. Test by pulling wand a few inches away from scalp and touching roots. If they are dry, it is likely you are done.
Want it straighter?
You may find you want to finish your look with flat ironing but that was not my goal. What I wanted to do was be able to stretch my hair in less time with less heat and no damage!
What I did
On soaking wet hair
The first time I used the dryer I did it on soaking wet hair and got my hair “bonish” straight. The results were great, I used very little product, but made sure I had my heat protectant on deck because I didn’t want ‘no smoke’ with this thing. (The size of the dryer can be kind of intimidating the first time)
I am not going to lie, I liked my results but I wanted to simplify my routine. The soaking wet way took me an hour so I didn’t save much time.
On twists
This was a fail! If you think you can twist or braid your hair and stick it in the wand for a stretched braid out or twist out it won’t work.
There are a few influencers claiming it works but take it from aunty Em,….NOPE! It will literally dry and frizz your ends and the air will not penetrate the braid or twist enough for the process to be worth dry ends.
When I tried this I ended up rewetting my hair, braiding and letting it air dry as normal.
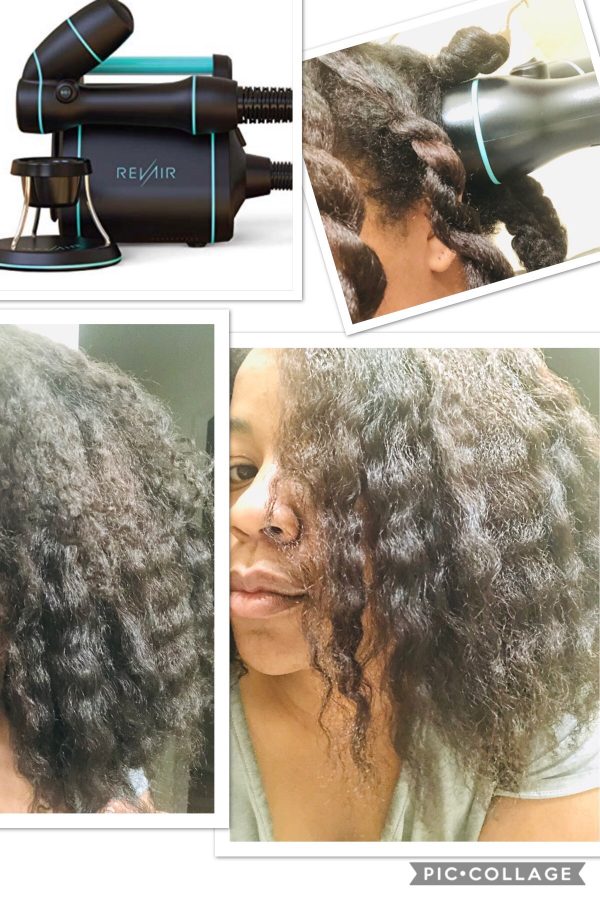
On textured overnight loose twists
My all-time favorite! – I washed and conditioned my hair as I would normally and detangled my hair in the shower. I added my usual, leave in and oils and installed loose twists all over my head. I had about 8 sections! I banded the twist on either side of my head, put my microfiber towel on and went to bed.
The next day I removed each twist and blow-dried each section of my hair finger detangling before adding the section to the dryer.
Here is the thing! I wanted to be able to stretch my hair in a textured state and maintain the moisture I added to my hair the night before.
see the texture in both pictures (unstretched vs stretched):
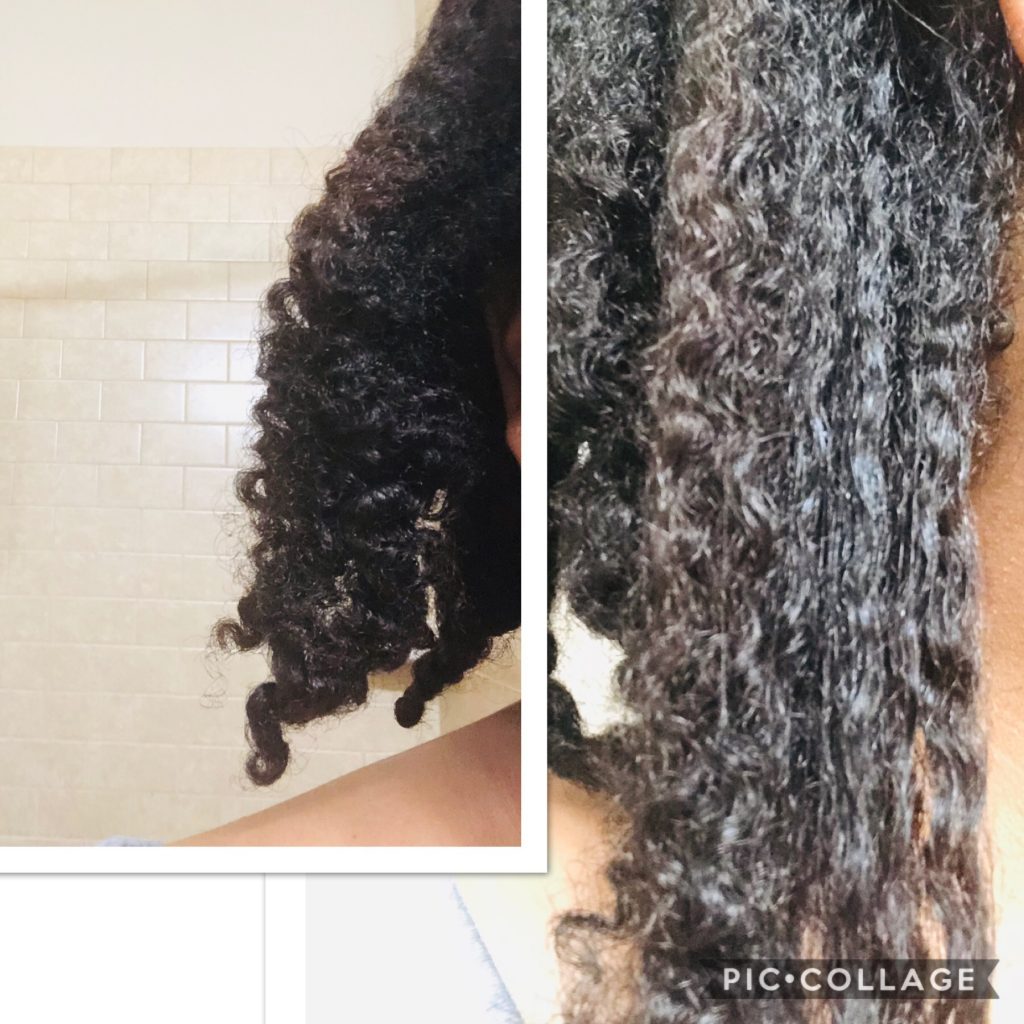
The results were a stretched beachy foundation that I can now style throughout the week.
Final thoughts
Y’all I’m hype! This is a darn good dryer! Not only has my hair reverted every time after every use (3 times in a month) but the time was cut down to about 30 minutes once I figured out MY METHOD.
Is it worth the $400? Maybe! The truth is I do not see myself ever needing another type of blow dryer and it actually saves me a ton of time on wash day and during the week with my normal routine.
If you want to learn more about the dryer, click here. Have you tried this blow dryer? – Let me know your thoughts below!