
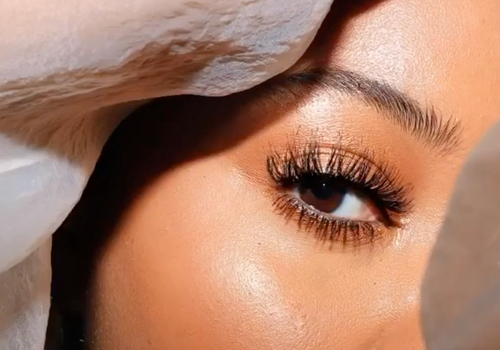
What pulls a look together better than a nice pair of false lashes?
Whether you’re doing a full glam look or opting for something more natural, the right pair of falsies will give you the oomph you’re looking for.
Unfortunately, it’s a struggle out here to even apply them!
They slip and slide as soon as they come in contact with any moisture; if you put too much glue, your eyelids are going to be stuck together for what feels like eternity; and let’s not even get into how heavy and dramatic they can be.
Truthfully, some of them look like wings. Chile, if you blink too hard you might mess around and fly away!
All jokes aside, applying false lashes can be a little intimidating, but it doesn’t have to be. Here are 3 tips to help you apply false lashes like a pro.
1.) Pick the right style, shape, and size.

Picking the right eyelashes for your eye shape is important because falsies are definitely not one size fits all.
So to pick the right style, shape, and size of your falsies, you must consider the size and shape of your own eye.
To help you out, here are a few general rules for the most common eye shapes:
For almond eyes: Almond-shaped eyes are sharply pointed at the ends but wider in the center.
This is the one-eye shape that looks great in practically all false lash styles, so the key here? Volume. Pick a set of lashes with a longer strip and even volume throughout.
For rounder eyes: Rounder eyes don’t have much of a slant and the iris of the eye tends to be completely visible.
The right lashes will be light, complementary, and curl up just enough to add a curve to your top eyelid. Avoid heavy lashes that weigh your eyes down.
For hooded eyelids: Hooded eyes are characterized by a crease right in the middle of the eyelid that accentuates the brow bone.
Since heavy lashes, long lashes tend to pull down hooded lids and poke at the brow bone, go for something short to mid-length and wispy.
For monolid eyelids: Monolid eyelids are when there is no crease visible whatsoever.
This type of lid is typically found on tight, slanted eyes so the right falsies would be long and fluttery enough to noticeably open up and enlarge the eyes.
For upturned eyes: With upturned eyes, the outer corners of each eye are turned up higher than the inner corners, similar to fox eyes.
Since these are perfect for cat eyes, try to play into that feature by opting for falsies that are more voluminous toward the ends.
It’s important to note that even if you get lashes that complement your eye shape, they could still be too long.
Don’t be afraid to cut them shorter at the ends to match your eyes.
Avoid cutting the place on the lash where there are tiny hairs.
That part represents the inner corner of your eye and won’t fit properly during application if cut.
2.) Change up how you use the glue.

Contrary to popular belief, knowing how to properly apply lash glue is actually the most important part of applying falsies.
This is because a messy, uneven glue job has the ability to break your look completely.
A few things to keep in mind:
- Before you try to place the lash on your eye, make sure the glue is tacky. No, not tacky as in ugly, but tacky as in sticky. You’ll know it’s the right consistency when it’s not super wet, but it’s not super dry, either. That’s the perfect in-between state.
- Make sure you grab a white glue that dries clear. Unlike a solid white or black glue, this will ensure that your glue won’t visible—especially if you mess up.
- Instead of squeezing the glue directly on the eyelashes, try putting a drop of glue on the back of your hand and rubbing the lash strip through it to ensure an even coat. You can also apply the glue with a small brush or qtip.
Be patient with this part! Don’t feel like you need to rush through it. Take your time, stay focused on proper application, and you’re all good.
3.) Zoom in—you need to see clearly.
Now, this part is super simple. Get a magnifying mirror! Or, at the very least, sit close to whatever mirror you do have so you can get up close and personal with your eyes.
The reason for this is that you need to do your absolute best to place the lashes directly on your lash line.
When you can’t see clearly, there’s a chance you’ll place them on your eyelid and end up with an odd-looking pair of double lashes. And that is no Bueno!
Once you’re up close, you can:
- Slide the lashes on with a pair of tweezers. If you’re more comfortable with your hands, go ahead and use those!
- Tweak and adjust them for a better fit. You need to do this quickly so that the glue won’t dry up on you too fast.
- Let them dry fully before you apply mascara. Stay in the mirror for this, too!
Pretty easy, huh? Now go go go grab a nice pair of lashes, follow our easy guide, and let us know how it goes in the comments!