Want to make your lacefront wigs and weaves look natural? Here’s a quick 8-tip guide to help you perfect your next install.
Tint and Bleach

If you’ve ever watched a tutorial, got a custom wig made, or even went to a stylist who deals with wigs or weaves, then you know that bleaching and tinting is the best way to remove those black dots from your lace and make it match your scalp.
This seems like a daunting task to do at home, but it’s actually quite easy once you have all the products you need and an easy-to-follow tutorial on hand. Here’s are a few tips to help you through this process.
Bleaching the Knots:
- Mix a powdered hair bleach like Clairol Professional BW2 Powder Lightener with a Volume 30 Developer until a thick paste is formed. It is important that the paste is thick enough to spread, but not thin enough to drip because you do not want it to run off the lace and onto the hair.
- Apply the paste to your lace with an applicator brush or old toothbrush and let it sit for two minutes before rinsing.
- Wash with a neutralizing shampoo like Clairol Professional Shimmer Lights to prevent your lace from turning yellow or orange.
To Tint the Lace:
- Use a brown hair tint or semi-permanent dye and mix it in a couple courts of boiling hot water and dip a white cloth or paper towel to test the color of the mix. The longer you dip, the darker it’ll come out.
- Dip your lace until you get your desired color. Do not worry about this mix coloring your dark hair. If you plan to dye your hair a lighter color, tint your lace first and dye after.
Stocking Cap Method

(source: Essie Michelle)
The “Stocking Cap Method” is exactly what is sounds like: putting on a stocking cap before you apply your lace frontal, except it is a more detailed process that ensures a natural and seamless install.
Applying The Stocking Cap:
- Pull a thin, tan wig cap over your head and make sure it covers the top of your ears and forehead. Make sure your hair is braided, twisted, or slicked down so that it’ll be completely flat once it’s time to apply the wig.
- Take a gel or hair-safe adhesive like Got2B Glued Freeze Spray or Gel and apply it to the wig cap, right along the edge of your hairline. Not on your hair, but right before your hairline begins.
- Blow dry it to speed up drying time.
- Cut the excess cap in the front that’s not glued to your forehead. After cutting, touch up any little parts that aren’t laid flat.
- Take a powder or liquid foundation in your skin color and apply it to the dome cap. This helps with blending lace.
- Put another thin layer of gel or adhesive on your cap hairline, allow it to get tacky and clear, and then apply your wig.
- Press wig hairline into place with the end of a rat tail comb or your hands.
Add An Elastic Band

(source: Ashley Bedeck)
Sewing an elastic band to your wig or lace frontal will help it lay down in a more natural way. It’ll also keep the frontal sturdy, preventing that annoying sliding back that we often experience. You can purchase a thick, stretchy band at Amazon and various online beauty supply stores.
Sewing The Band:
- Measure the band by placing it from one ear, stretching it along the back of your head, and stopping at the other ear. Cut it at this length.
- Sew the edge of the band to one side of the wig or frontal, and then sew the other part on the free side. When you place the wig or frontal on your head, the band should stretch across the back, just like it did when you were measuring it.
- Make sure the band is not too tight or too loose, just secure.
Pluck The Hairline

(source: Bodiedbykiera)
The whole point of plucking your lacefront is to minimize the fullness so that it’ll match your natural or ideal hairline. This is a very necessary step that should not be skipped because it’s vital if you want the hair to look like it grew from your scalp.
Tips for Plucking:
- Tweeze your hairline slowly and a little at a time to avoid removing too much hair or ripping a hole in your lace.
- Use a wig head so that you can get a better idea of how the plucked wig may look on your head.
- Instead of plucking right where the hairline starts, part a thin layer down and pluck behind the hairline.
- Pluck going back, not pulling or going upward or forward. This helps with gradually and naturally thinning the hairline.
Razor Cut The Lace

(Source: https://lacefrontwigreview.com/remy-full-lace-wigs/505-how-to-make-the-perfect-360-frontal-wig-step-by-step-tutorial/)
Simply put, cutting the lace straight across with scissors does not look natural. Even when you follow the shape of the hairline or cut jagged edges, it comes off too uniform to look like your real hairline.
Instead, use the scissors to cut off a big portion of the lace, but once you get closer to the hairline, use an eyebrow razor for a more precise and natural cut.
Avoid The Baby Hair

(source: Ashley Bedeck)
Let’s be real for a minute, guys. Baby hair is cute, but some of y’all have baby hair that looks fully grown. This is the reason why you’re lacefronts tend to look unrealistic because for the majority of us, edges don’t naturally swoop and swirl like that.
Instead, just make sure you have a good hairline going on your lacefront and create some edges that match what you could actually were daily or on any occasion, and looks like it can actually be achieved on real hair. If you just can’t stay away from the baby hair, just tone it down! Do a cute little swoop here and there, and call it a day.
Foam and Wrap Method
(Source: Slayedby Jordan)
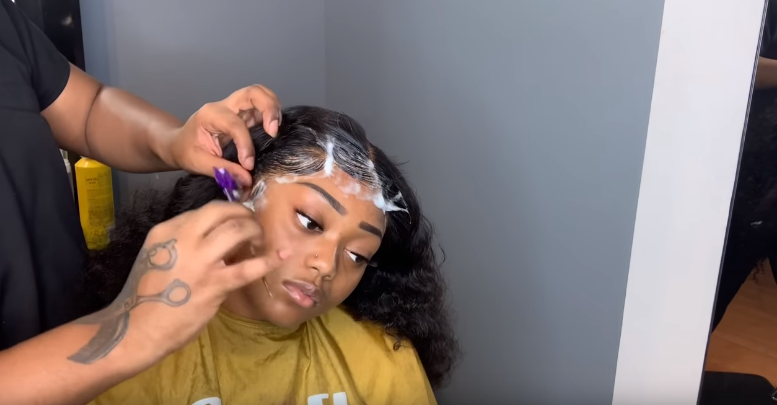
Applying a setting or wrapping foam lotion like Bronner Bros. Foam Moisturizing Wrapping Lotion to your hair while you are styling the edges and hairline of the hair makes for a really soft and natural lay down. Unlike gel, foaming lotion will hold your hair in place but won’t make it crunchy or hard. This is the great because if you want to take your wig off or style it different, it can easily be adjusted.
Just apply the foam to the area you’re working on, style it how you want it, wrap your edges down with a satin scarf or black wrapping strips, and then completely allow it to dry with a hairdryer or hooded dryer.
Pick The Right Texture For You
 (Source: Sade Watkins)
Silky textures are gorgeous and offers up something new when we want a break from what we’re used to. However, when you want your lacefront to look as natural as possible, it may be best to avoid silky textures and go for textures that would match your real hair if it were blow dried, straightened, natural, or relaxed. Here are some hair textures and patterns to look for:
- Kinky Straight (Blown out or straightened natural hair)
- Light Yaki (Straightened relaxed hair)
- Kinky or Kinky Coily (Type 4)
- Afro Curly (Type 3 and 4 curls and coils)
- Mongolian Curly (Type 3 curls)
- Water Wave (Type 2 Waves)
- Deep Curly (3b/3c curls)
- Brazilian Curly (Defined 3c curl)


